Shopify Source
Connect your Shopify store to Elevar and get the scripts for headless pages.
Overview
Follow this guide to learn how to configure the Shopify Source in Elevar. This setup connects your Shopify store to Elevar, enables checkout tracking, and provides the browser scripts required for headless storefront pages.
Before starting, ensure you have:
- Admin access to your Shopify store
- Access to the Elevar app
Setting up the Shopify Source includes the following tasks:
- Configuring your Shopify store connection
- Setting up the custom pixel for checkout tracking
- Enabling the app embed for theme-based tracking
- Configuring Non-Shopify Subdomains to retrieve browser scripts for headless pages
TIP
If someone from your team already completed the Shopify Source setup, you can skip directly to the Get Browser Scripts section to retrieve the scripts needed for your headless pages.
Edit Store Settings
After installing the Elevar app from the Shopify App Store, you will be prompted to set up the Shopify Source. Click "Set Up Now" to begin. 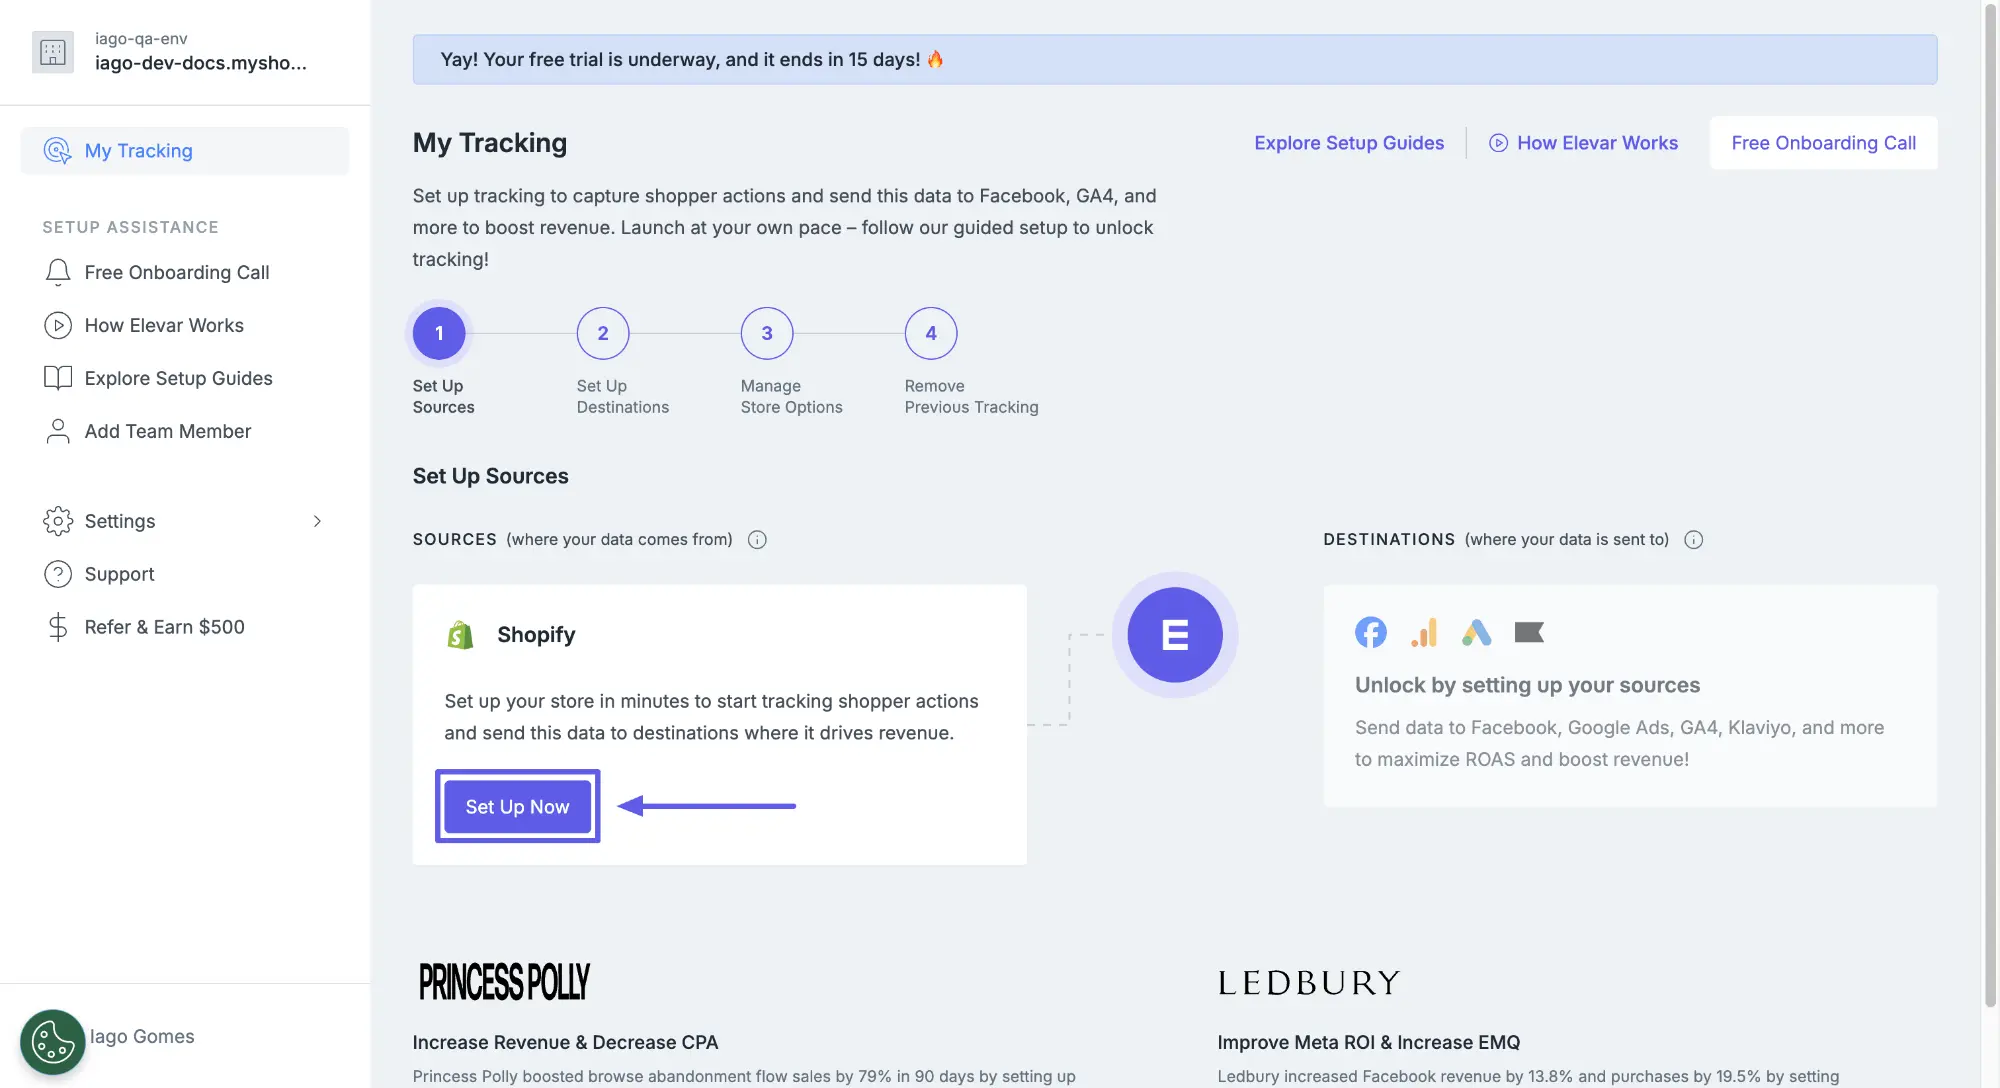
Configure Store Connection
- Once on the Store Settings page, confirm that the connected store URL is correct and choose whether to allow Google Tag Manager for client-side tracking.
Client-Side Tracking Options:
- Using Elevar (Recommended): Leave this option unchecked to allow Elevar to manage client-side tracking automatically during destination setup.
- Using Google Tag Manager: Enable this option if you plan to manage client-side tracking using your own GTM container. You must provide your GTM container ID.
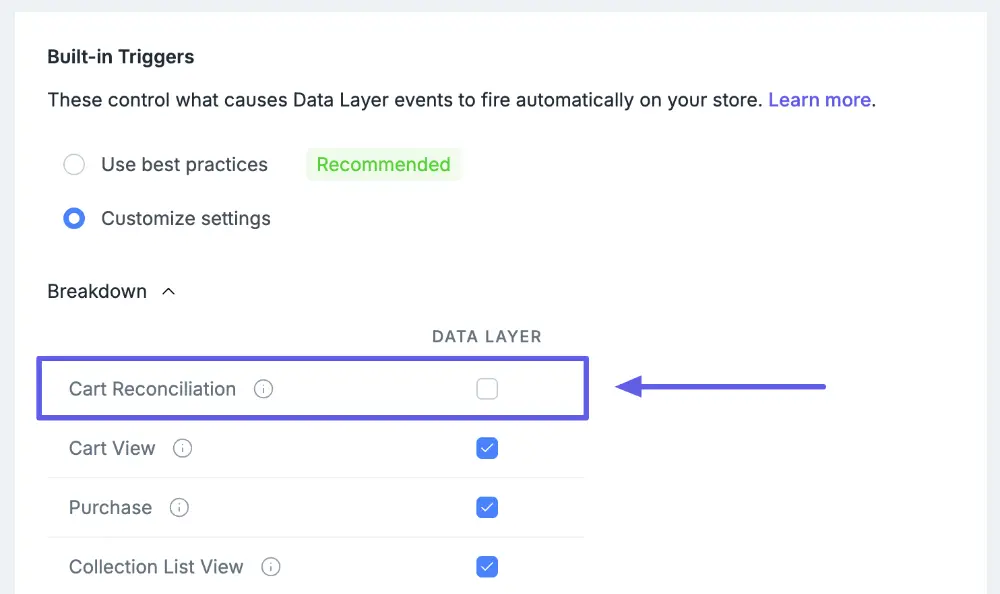
Customize Built-in Triggers
Elevar provides built-in triggers that automatically push events to the Data Layer. For headless websites, we recommend unchecking the Cart Reconciliation trigger. If enabled, it will fire add to cart events for any products in your cart when entering checkout, duplicating events already sent from your headless frontend:
Click Save & Continue to proceed.
Edit Subscription Settings
Select whether you sell subscription products. If you select Yes, Elevar will offer an option to send recurring transaction events when you set up destinations.
Click Save & Continue to proceed.
Configure Consent Mode
Configure how Elevar handles user consent:
- Choose whether to enable Consent Mode integration
- If enabled, select consent fallback behavior when consent choices aren't received
INFO
The source where Elevar reads consent signals depends on your client-side tracking method:
- Using Elevar: Reads from Shopify Customer Privacy API
- Using Google Tag Manager: Reads from Google Consent Mode
Click Save & Continue to proceed.
Configure Custom Pixel
The custom pixel tracks checkout events on Shopify-hosted checkout pages. Follow the instructions provided in the Elevar app to copy the code snippet and add it as a custom pixel in your Shopify Admin.
After completing the setup in Shopify, return to the Elevar app and click Mark as Complete.
Enable App Embed
The app embed enables tracking on your Shopify theme pages and is enabled by default.
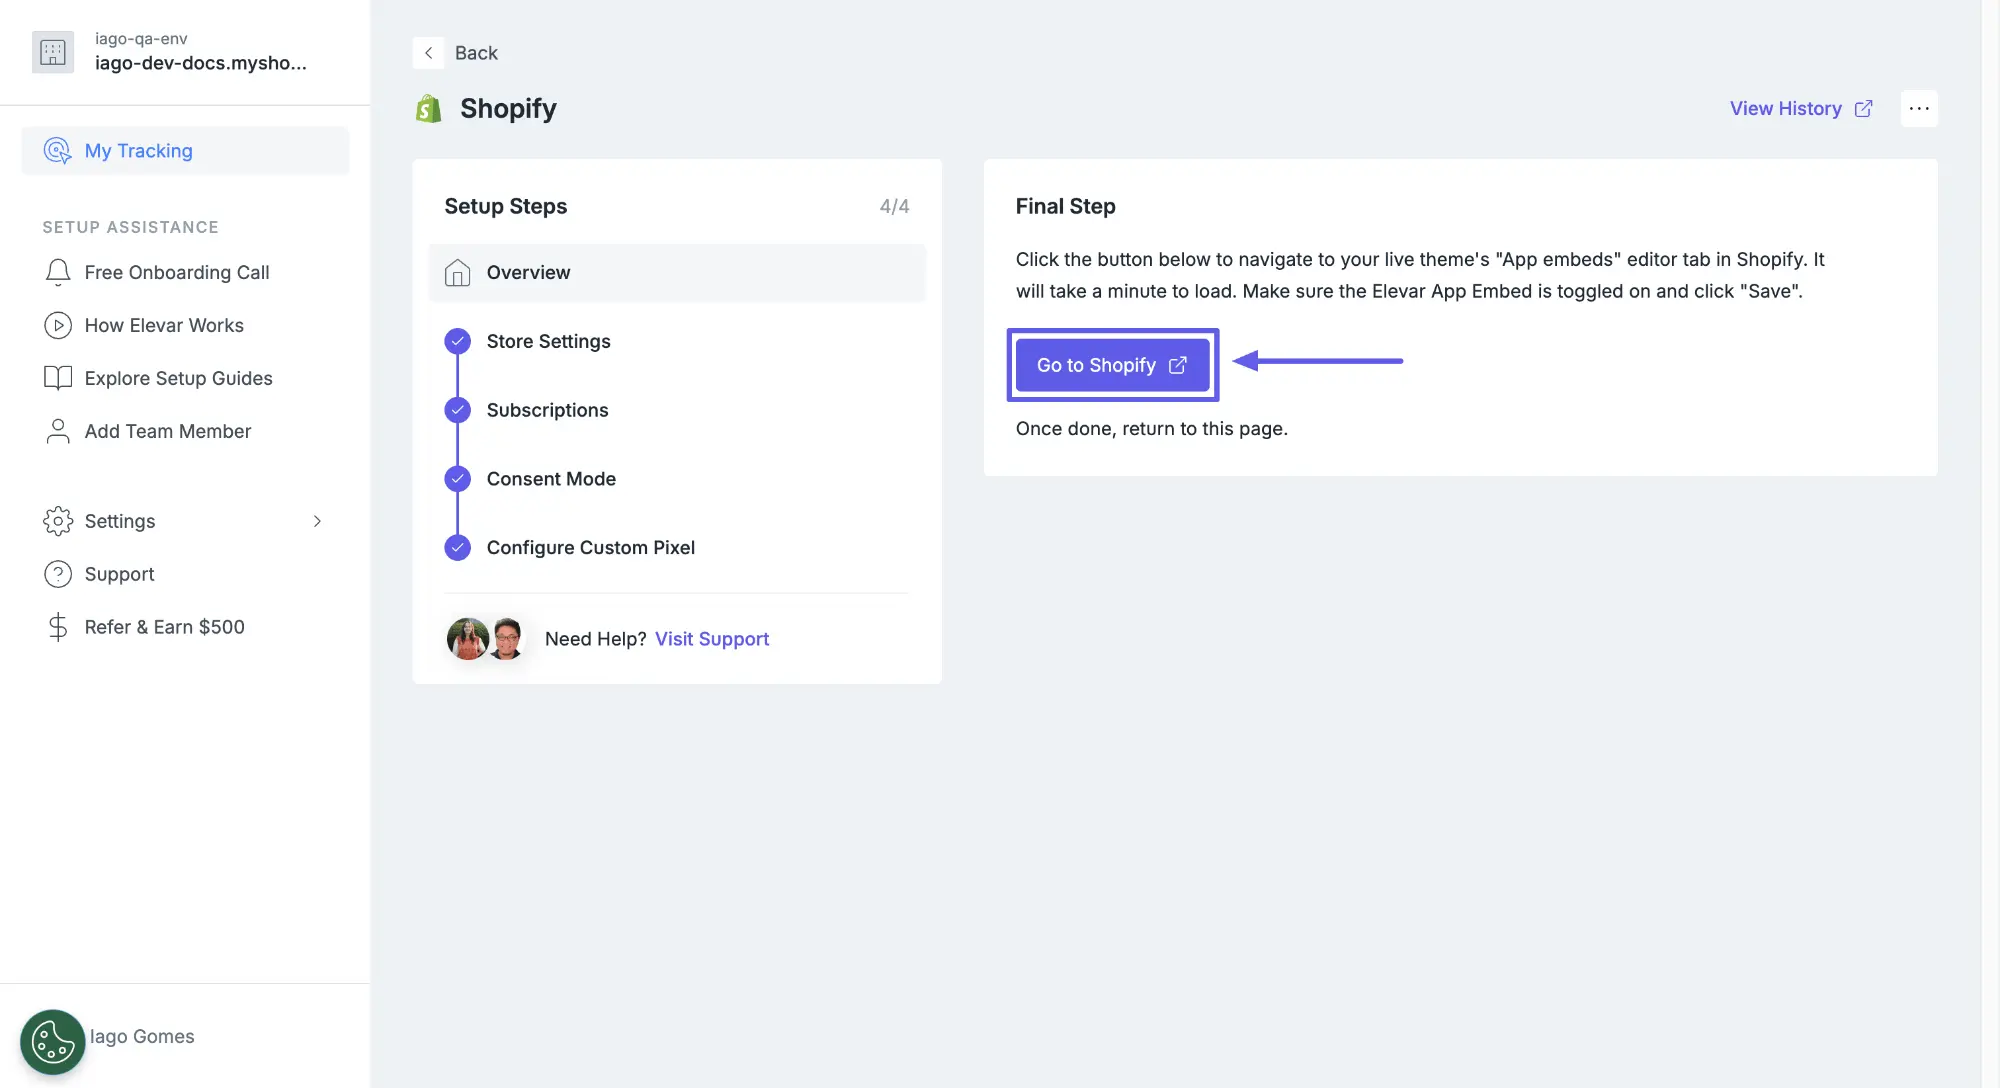
Click Go to Shopify to open your theme editor and verify the Elevar Data Layer app embed is enabled, then click Save in the top right corner.
WARNING
After saving, you'll see a Not Detected on Live Theme warning in the Elevar app. This is expected for headless websites, you can safely ignore this warning and continue.
Get Browser Scripts
After completing the Shopify Source setup, retrieve the browser scripts required for your headless pages.
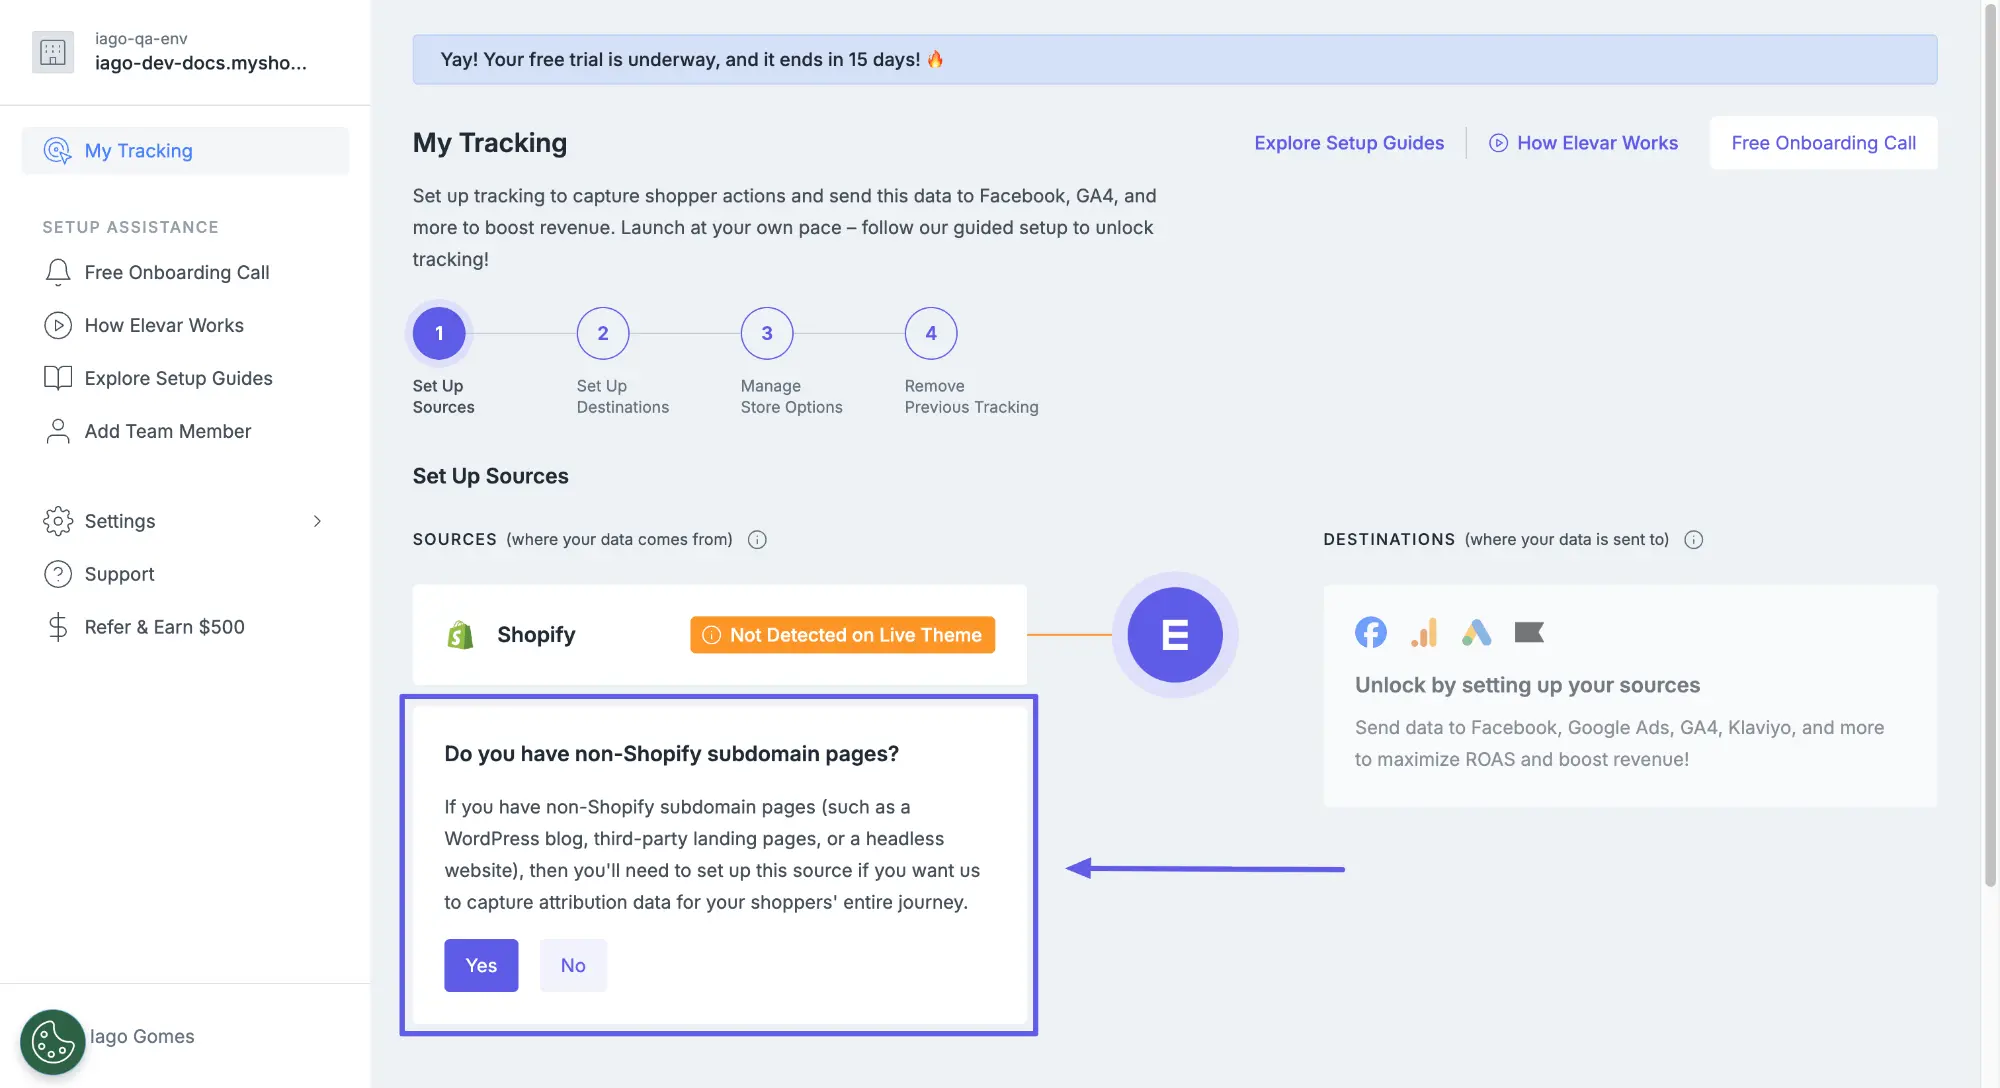
Create the Non-Shopify Subdomains source where you'll get the scripts, find the box "Do you have non-Shopify subdomain pages?" and click Yes.
Configure Domain
- Click Get Started in the Non-Shopify Subdomains overview
- In Domain Details, enter your overarching domain
WARNING
Use your root domain (e.g., example.com), not just the headless subdomain. This ensures proper cross-domain tracking and attribution. For more details, see Overarching Domain.
TIP
Your checkout must be on the same domain as your headless pages (e.g., www.example.com → checkout.example.com). For more details, see Checkout URL.
Click Save & Continue to proceed.
Copy Browser Scripts
In the Prepare Your Pages section:
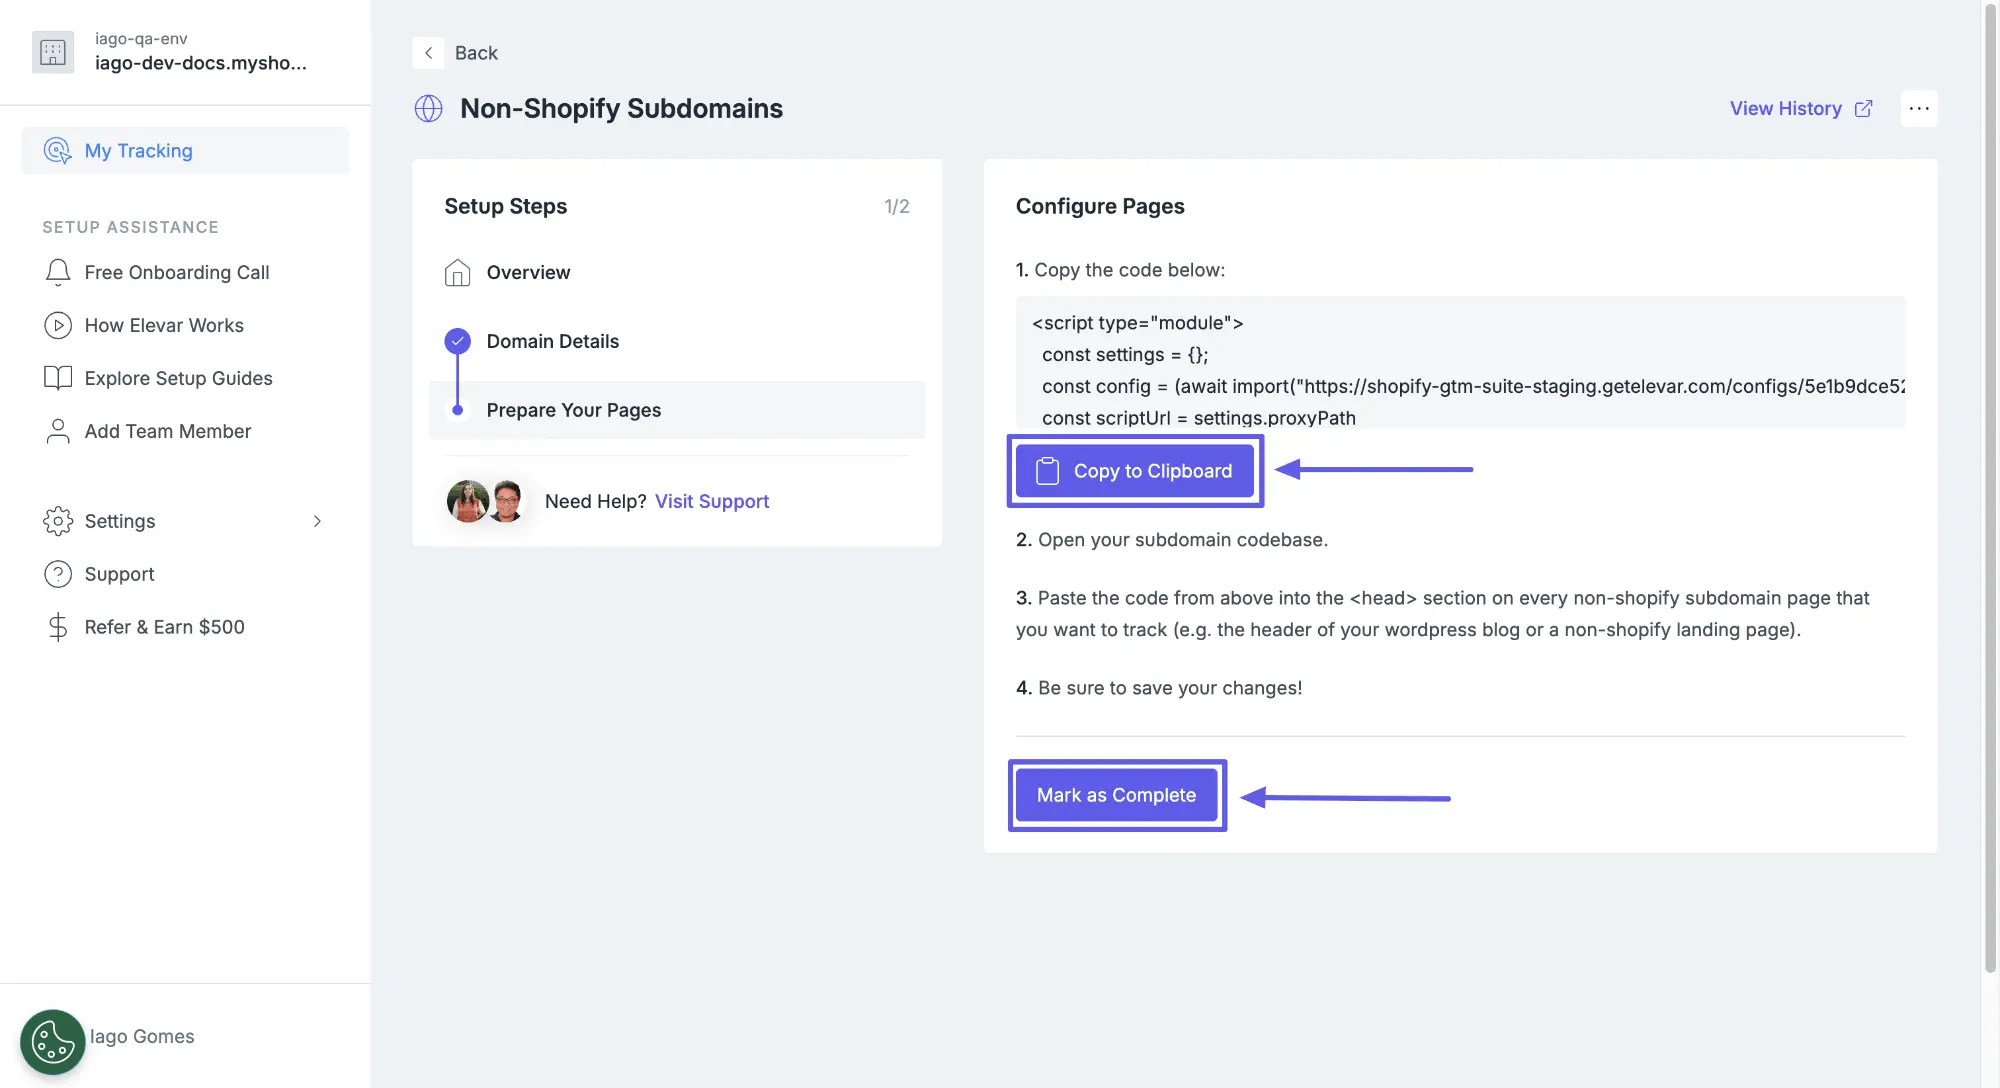
- Click Copy to Clipboard to copy the browser script
- Save this script and follow the Install Scripts guide
- Click Mark as Complete to finish
Common Questions
Do I need to configure the custom pixel for headless?
Yes, the custom pixel is required even for headless implementations. It tracks checkout events when users reach Shopify-hosted checkout pages.
Can I change my client-side tracking method later?
Yes, you can update this setting at any time. However, changing from Elevar to GTM requires installing the GTM container, and changing from GTM to Elevar requires removing existing tags to avoid duplicate tracking.