Install Scripts
Learn how to add the Elevar scripts to push events to our Data Layer.
Overview
Follow this guide to learn how to install the required Elevar scripts on your site. These scripts enable Elevar to capture Data Layer events, manage user sessions and consent state, preserve marketing attribution such as UTMs and click IDs, and forward data to Elevar’s servers for processing.
INFO
The installation process varies slightly depending on your implementation path. After identifying your Client-Side Tracking Method, follow the appropriate section based on your architecture:
- Headless: follow the Headless Installation section
- Agnostic: follow the Agnostic Installation section
Client-Side Tracking Method
Elevar supports two methods for client-side tracking. You select your preferred method during destination setup in the Elevar app, but you must understand your choice before installing scripts. This is especially important if you choose Google Tag Manager, which must load before the Elevar scripts.
![]()
Option 1: Using Elevar (Recommended)
Elevar manages client-side tracking automatically. This option:
- Requires no Google Tag Manager account or configuration
- Automatically keeps client-side tracking up to date
- Is ideal for teams that want Elevar to manage the full tracking pipeline
Option 2: Using Google Tag Manager
You manage client-side tracking using your own GTM account. This option:
- Provides full control over client-side tag configuration
- Requires manual setup and ongoing maintenance of GTM tags
- Is ideal for teams with existing GTM infrastructure or advanced tag management needs
INFO
You can select your preferred client-side tracking method during the destination setup in the Elevar app. The choice doesn't affect server-side tracking, which Elevar always handles.
Headless Installation
Only for Shopify Headless integrations
Follow these steps to install Elevar scripts on your headless storefront.
WARNING
Complete the Shopify Source setup before proceeding. This creates the connection between your Shopify store and Elevar. You'll see an option to "Allow Google Tag Manager for client-side tracking", check this if using GTM, or leave unchecked to let Elevar manage client-side tracking.
Install Google Tag Manager:
TIP
Skip this step if you selected "Using Elevar" for client-side tracking.
For web container installation steps, refer to Google's official guide: https://support.google.com/tagmanager/answer/14847097
Multi-Market Setup
If you're using Shopify Markets with different pixels per market, you'll need to:
- Load different GTM containers per Shopify Market
- Pass valid market IDs (see Market ID)
- Configure your Shopify source and destinations for different markets
Install Elevar Browser Script:
- Begin on the Elevar Dashboard and use the left-hand navigation menu to access "My Tracking". Navigate to your list of sources and access your Non-Shopify Subdomain Source.
- Use the "Setup Steps" navigational box to locate and click on the "Prepare Your Pages" step.
- Navigate to the section of the page titled "Configure Pages" and copy the script code provided.
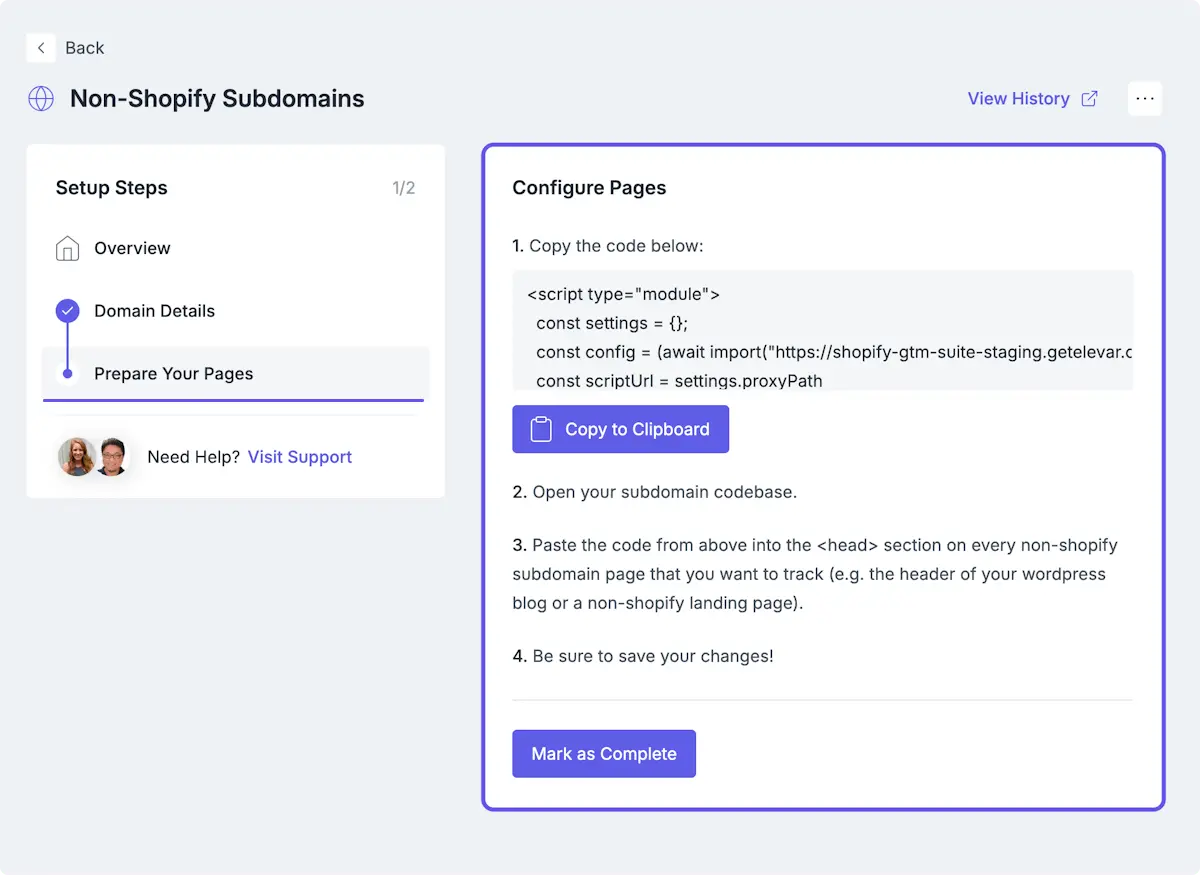
- After copying the provided script code, paste the code into the
<head>section on all pages that you want to track.
Important Notes
- The script will return a 404 error unless your Shopify source is fully installed.
- For headless implementations using Shopify's Storefront API, you must use the Cart Object (not Checkout Object) for proper attribution tracking.
- Shopify checkout pages automatically include Elevar scripts via the custom pixel, no manual installation needed there.
Agnostic Installation
Only for non-Shopify integrations
Follow these steps to install Elevar scripts on your non-Shopify store.
WARNING
Complete the API Source setup before proceeding. This configures your browser credentials, and you'll see an option to "Allow Google Tag Manager for client-side tracking", check this if using GTM, or leave unchecked to let Elevar manage client-side tracking.
Install Google Tag Manager:
TIP
Skip this step if you selected "Using Elevar" for client-side tracking.
For web container installation steps, refer to Google's official guide: https://support.google.com/tagmanager/answer/14847097
Install Elevar Browser Script:
- Begin on the Elevar Dashboard and use the left-hand navigation menu to access "My Tracking". Navigate to your list of sources and access your API Source.
- Use the "Setup Steps" navigational box to locate and click on the "Browser Setup" tab.
- Copy the script code provided.
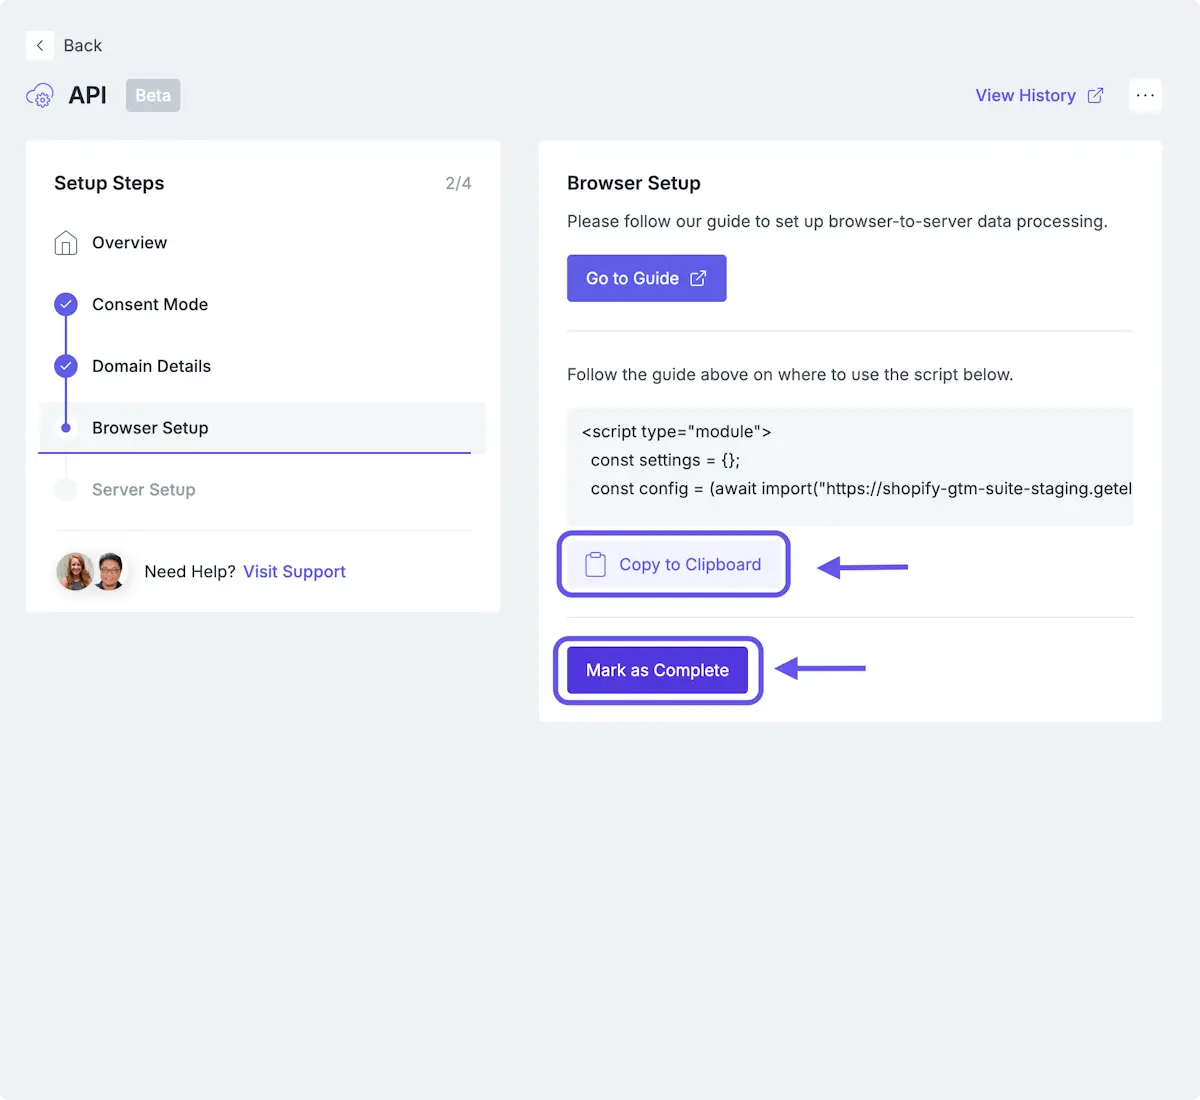
- After copying the provided script code, paste the code into the
<head>section on all pages that you want to track.
Important Notes
- Since you're managing your own checkout flow, ensure the script is loading on all pages, including checkout and order confirmation pages.
- Make sure you generated a browser signing key during the API Source setup, this is required for browser-to-server data processing.
Verification
After installing the scripts, verify they're working correctly:
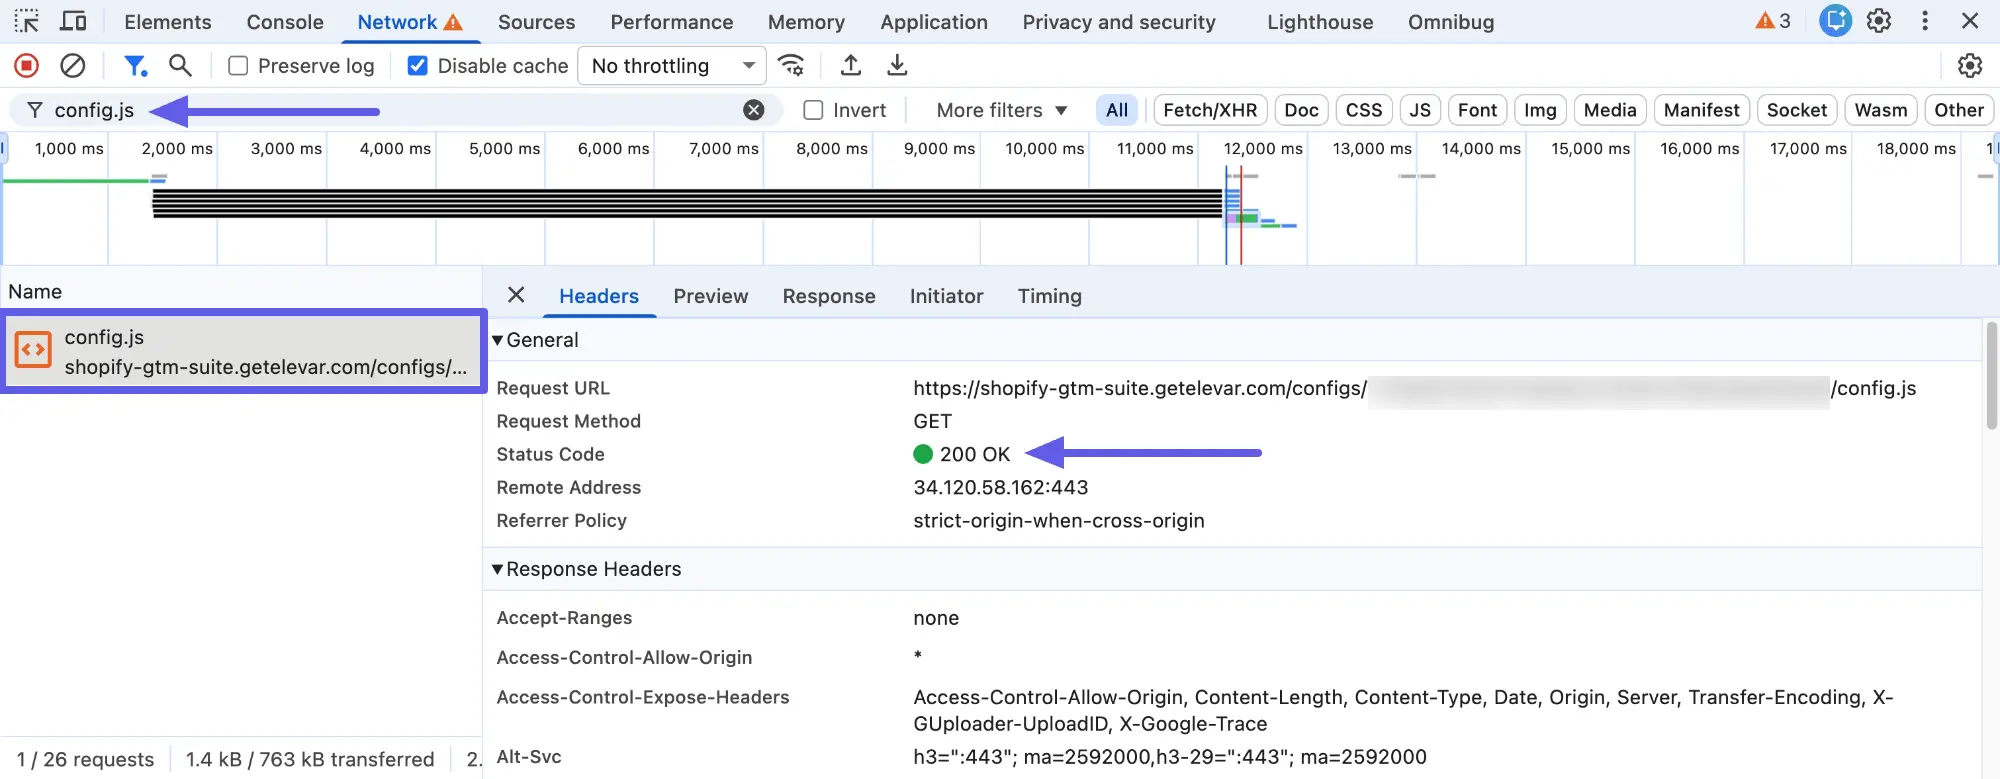
Network Verification:
- Begin by opening your website in a browser and access the browser's developer tools
- Go to the Network tab and refresh the page
- Filter by
config.jsin the search box - You should see a request with a 200 status code
Console Verification:
You can also confirm that Elevar’s global objects are available by checking the Console tab.
| Object | Purpose |
|---|---|
| ElevarDataLayer | Main event array, push events here |
| ElevarConsent | Consent state management |
| ElevarDebugMode | Enable/disable debug logging |
| ElevarInvalidateContext | Force context refresh |
| ElevarClearStorage | Clear all storage and reload |